Where did website traffic come from? How much traffic we generated from external sites?

Where did website traffic come from? How much traffic we generated from external sites?

Understanding Traffic Sources and Tracking External Links: A Guide for WordPress Site Owners

Hello, and welcome to this video where we’ll demystify two critical aspects of managing a WordPress website. Our focus today is on Fair Share Tech, and we’ll explore the origins of its web traffic and how to effectively track clicks on external links. Let’s dive in.

You may read this blog for the steps in textual form or watch the video provided at the end of the blog.

Where did website traffic come from?

— answer to this question help us understand where to focus our limited marketing resources.

How much traffic we generated from external sites?

— answer to this question help us understand which external party are we helping and ensure we are getting fair deal for referring potential customers

Deciphering Traffic Origins with Google Analytics

First up, where does Fair Share Tech’s traffic originate? Is it through search engines, or do other websites refer visitors by featuring external links to fairshare.tech? The answer lies within the powerful tool that is Google Analytics.

Setting up Google Analytics 4 (GA4) on your site is straightforward. Once active, it begins the essential task of data collection. After giving it some time to accumulate data, your next stop is the ‘Acquisition’ section. Here, you’ll find insights under ‘Traffic Acquisition.’ This report breaks down the traffic into categories like referral, direct, and organic search, providing a broad understanding of your traffic sources.

However, to pinpoint exactly which websites are referring traffic to fairshare.tech, delve into the details by selecting ‘Source/Medium’ from the dropdown menu. This action reveals the actual websites directing visitors to your site. A treasure trove of data awaits as you navigate through the pages, uncovering all referring sites to Fair Share Tech.

Tracking Outbound Clicks: A WordPress Solution

Now, onto our second query: How do we track the number of times fairshare.tech refers visitors to external sites? WordPress site owners have an array of tools at their disposal, but for simplicity and efficiency, installing a specific plugin, such as “Track The Click,” comes highly recommended.

Once installed, allow some time for the plugin to gather data. It then presents a straightforward report showing the frequency of outbound clicks from your site. For instance, if Fair Share Tech links to validate.com, the plugin will display the total clicks this link has received.

To illustrate, let’s conduct a live test. Visiting Fair Share Tech, I click on a blog post that links to https://validat.in/. Returning to the plugin’s report and refreshing the page reveals an updated click count, confirming the tracking is working perfectly.

In conclusion, we’ve answered two pivotal questions: identifying the sources of incoming traffic and monitoring the success of outbound links. These insights are invaluable for any website owner looking to understand their audience better and refine their content strategy.

Thank you for joining me on this exploratory journey. Stay tuned for more tips on maximizing your website’s potential.

Easiest way to start selling an e-book

Easiest way to start selling an e-book

Selling an book in PDF format, zero set up fees!

We are thrilled to announce a significant milestone in our journey to revolutionize the way authors / publishers distribute their books. As of now, three esteemed authors / publishers have chosen to partner with us, offering their valuable books for rent on DriveLMS.com. Explore their collections today:

What Sets Us Apart?

At DriveLMS.com, our commitment is to provide a platform that benefits both authors / publishers and readers without the burden of upfront costs or recurring subscription fees. Here’s how we make a difference:

  • Zero Setup Fees & Subscription Charges: Our partnership model is designed to ensure that your costs are directly tied to your success. We only earn when you earn, creating a mutually beneficial ecosystem.
  • Performance-Based Charges: Embrace the freedom of earning with us without any upfront investment. Our transparent billing is solely based on the performance of your rented books.
  • Flexible Reading Periods: Tailor the rental duration to fit your strategy and your readers’ preferences. While we typically recommend a 1-year period, the choice ultimately rests with you.
  • Simple Requirements: To get started, all we need is your book in a standard PDF format. It’s that easy!
  • Human Support: You will get support from Fair Share IT Services. Just click on the WhatsApp button and get in touch with us.

Join Us Today

Leverage our innovative platform to expand your reach and connect with more readers than ever before. DriveLMS.com is not just a service; it’s a partnership where your success is our success. Please click on the below link to connect with us via WhatsApp (please mention your name and your interest in selling an e-book):

https://api.whatsapp.com/send?phone=%2B919850830247&text=Hello%20My%20name%20is%20and%20I%20am%20interested%20in%20selling%20e-book%3A%3A%20,

How to message potential candidates on LinkedIn for free?

How to message potential candidates on LinkedIn for free?

This article assumes that:

  • You want to increase your LinkedIn network significantly by searching for candidates on LinkedIn.
  • You want keep using free LinkedIn plan.
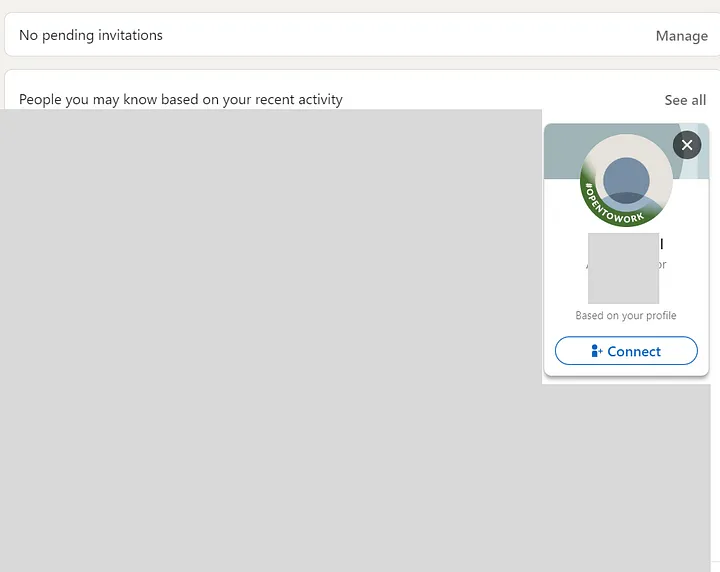
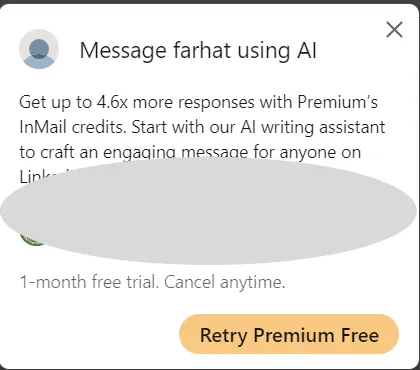
  • You find candidates that are OPENTOWORK but when you click on message, LinkedIn tells you to buy a plan. [See inserted images]
  • LinkedIn does not stop this feature [working as of 21-Oct-2023]


  • Login to LinkedIn as usual. After click on:

LinkedIn My Network Suggests based on previous searches

  • Or after searching for candidates, you will see below screen:

Click on the profile (do not click connect)

Trying to message a potential candidate using LinkedIn for free

LinkedIn asks to buy premium plan


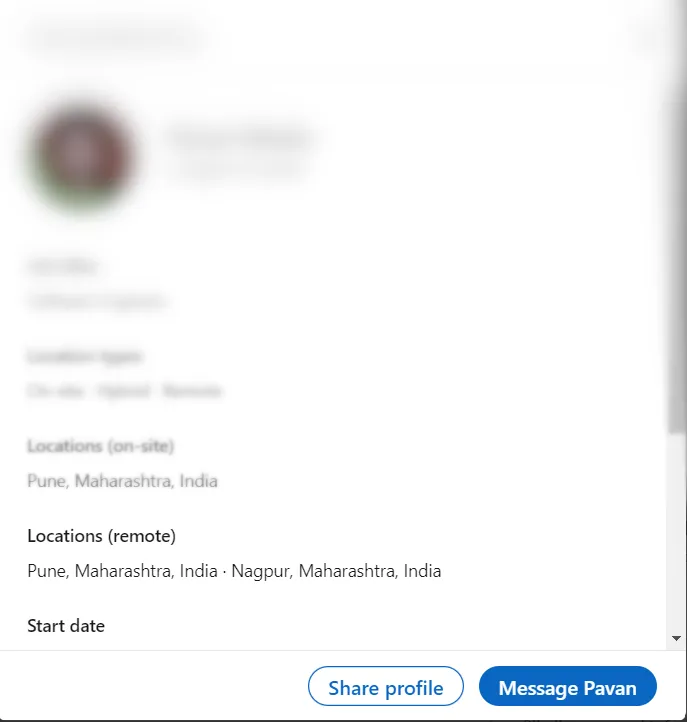
  • Just scroll a but below on the candidate profile and you will be see below:

Click on Show details


Click on Message

  • That’s it! Send your first message and hope the candidate responds!

Visual creation experiment with ChatGPT

Visual creation experiment with ChatGPT

Visual creation experiment with ChatGPT 4. Conclusion: The designers can rest easy but not too easy.

I played around with ChatGPT to create an image. See this short video: https://youtu.be/JS–PtghbUI

We all know that chat GPT is making waves that it can make images. So I thought that I will try something but to those who do not have that much time to go through the whole video, I will give you the bad news and the good news especially to the creative and visual makers. The bad news is that the AI really comes up with some stunning images with a simple prompt. But here is the good news for you guys, it is still not there fully, it is going to take probably for a few number of years and of course the creative and visual guys will of course keep on improving and making better visuals.

So that way I think your job is not at risk at this moment at least. I asked ChatGPT, if it can replace the image of Rajanikath drinking alcohol in Chalbazz by badminton racket instead of glass. Now this is the good part. It came back with a stunning image with badminton racket in his hand. It made a spelling mistake here, that’s fine. I could have corrected it later on. But then I told him that can you use this photo like attire from the Chalbazz please and also no glass but racket in the right hand. So it made it. So now racket is in the right hand and removed the glass but then the attire is not from Chalbazz movie. Maybe some other scene in the Chalbazz movie but not that famous scene.

Now the bad part. The glass was not removed. There were spelling mistake. The logo was not used as is. It kept on making new mistake by recreating images instead of making those small fixes in the previous one.

Conclusion: The visual and creative designers can rest easy but not too easy.

Enhance Your Marketing with Our QR Code-Based Freebie Distribution Tool

Enhance Your Marketing with Our QR Code-Based Freebie Distribution Tool

Introduction:

Elevate your lead generation strategy with our advanced tool, uniquely designed to engage potential customers through QR code-accessible freebies. Offer compelling items like ebooks, catalogues, or coupon codes, and make capturing lead information a seamless experience.

Key Features:

– QR Code Accessibility: Each freebie offer is linked to a unique QR code. Potential leads can easily scan these codes from various strategic locations, such as shop entrances, product packaging, or exhibition stalls.

– Interactive Lead Capture Form: Upon scanning the QR code, leads are directed to a simple form where they can provide their contact information, ensuring you collect valuable data for follow-up and engagement.

– Email Delivery of Freebies: To ensure leads provide accurate email addresses, the freebie is sent directly to their inbox, adding an extra layer of verification and value to the exchange.

– Customizable Offers: Tailor your freebie content to align with your target audience’s interests. Whether it’s detailed catalogues, exclusive discounts, or informative ebooks, choose what best suits your marketing goals.

Benefits for Your Business:

– Direct Engagement with Potential Customers: The QR code and form mechanism encourages direct interaction, making the lead capture process more engaging and effective.

– Increased Brand Exposure: Placing QR codes in high-traffic areas enhances your brand’s visibility and offers more opportunities to attract leads.

– Innovative and User-Friendly: Our tool offers a modern, tech-savvy approach to lead generation that is both innovative for your business and user-friendly for your customers.

– Effective Data Collection: Collect accurate and valuable contact information from interested leads, paving the way for successful marketing campaigns and customer relationships.

Get Started Today:

Transform your marketing efforts with our QR code-based freebie distribution tool. [Try it now](#) and experience a smarter way to attract and engage leads.

Want to see it in action or learn more? [Contact us](#) today for a demo or additional information, and take the first step towards revolutionizing your lead generation approach.

Please contact us for more details: https://fairshare.tech/contact-details-of-software-company-pune/

Generate Sitemaps In Laravel

Generate Sitemaps In Laravel

A sitemap is an important part of any website. It stores all the URLs available on your website, usually in an HTML format or more commonly in an XML format. It allows your website to be accessed by web crawlers and retrieve necessary information using web scraping. Sitemaps can also boost your website’s SEO ranking since they make it easier for search engines to navigate through your website. They can be categorized into static and dynamic sitemaps and can be generated for both static and dynamic websites.

Sitemaps For Static Websites

Static websites contain hardcoded URLs and a fixed number of web pages. A sitemap for a static website can be created easily using an online sitemap generator tool such as XML-Sitemaps  (http://www.xml-sitemaps.com).

To use a sitemap generator, you need to enter your website’s URL to automatically generate a sitemap. Here, we are creating a static sitemap that can only be altered manually by a developer. This method works best for websites with a smaller yet fixed number of web pages. An example of a static sitemap would be as follows

<?xml version=“1.0” encoding=“UTF-8”?>
<urlset xmlns=“http://www.sitemaps.org/schemas/sitemap/0.9”>
    <url>
        <loc>https://www.example.com/</loc>
        <lastmod>2024-01-12T00:00:00+00:00</lastmod>
        <changefreq>weekly</changefreq>
        <priority>1.0</priority>
    </url>
    <url>
        <loc>https://www.example.com/about-us</loc>
        <lastmod>2024-01-12T00:00:00+00:00</lastmod>
        <changefreq>monthly</changefreq>
        <priority>0.8</priority>
    </url>
    <url>
        <loc>https://www.example.com/contact</loc>
        <lastmod>2024-01-12T00:00:00+00:00</lastmod>
        <changefreq>monthly</changefreq>
        <priority>0.7</priority>
    </url>
</urlset>


We observe that this sitemap contains the URLs of the ‘home’ page, the ‘about’ page, and the ‘contact’ page.

Seemingly static websites created by WordPress make use of plugins etc to generate sitemaps automatically. 

Sitemaps for Dynamic Websites

The code showed here is an actual example from NSE INDIA holiday API Portal

Generating a sitemap for a dynamic website is relatively more complex since dynamic websites contain a variable number of web pages and support CRUD operations. Moreover, if a website contains authentication, web crawlers won’t be able to access the web pages visible to users after logging in. In this case, a static sitemap generator will not produce accurate results. Even if a sitemap is generated this way, developers would have to constantly track and update the sitemap based on changes occurring in the website.

Nevertheless, we can generate a dynamic sitemap for a website in Laravel. For this, we require three things – a controller to define the logic for creating the sitemap, a route to define the route of the sitemap, and a kernel function to automate the process of updating the sitemap periodically.

Creating The Controller

To create a controller we use the following command in Artisan.

php artisan make:controller SitemapController


A controller is created in the ‘app’ directory under the ‘Controllers’ folder. Now, we need to define the command name and provide a description of the command. 

protected $signature = ‘sitemap:dynamic’;
protected $description = ‘Generate sitemap for the dynamic website’;


If you have any specific links that you would like to retain in the sitemap, you can declare them too. For that, you need to just define the base URL and the URLs of the websites that you would like to keep. Here, the base URL is typically denoted by ‘/’ but you can also use ‘app.url’ found in the .env file of your Laravel project.

$baseUrl = config(‘app.url’);


$sitemap = ‘<?xml version=”1.0″ encoding=”UTF-8″?>’ . PHP_EOL;
$sitemap .= ‘<urlset xmlns=”http://www.sitemaps.org/schemas/sitemap/0.9″>’ . PHP_EOL;

$fixedUrls = [                                   // define specific URLs
    $baseUrl,
    $baseUrl . ‘/login’,
    $baseUrl . ‘/password/reset’,
];


We can use this piece of code to loop through the fixed routes and generate the XML for the static links in the sitemap.

foreach ($fixedUrls as $url) 

{
    $lastmod = Carbon::now()->toIso8601String();
    $sitemap .= “\t<url>” . PHP_EOL;                            // <url> opening tag
    $sitemap .= “\t\t<loc>$url</loc>” . PHP_EOL;                // URL of the webpage
    $sitemap .= “\t\t<lastmod>$lastmod</lastmod>” . PHP_EOL;    // day last modified
    $sitemap .= “\t\t<priority>1.00</priority>” . PHP_EOL;      // priority of URL
    $sitemap .= “\t</url>” . PHP_EOL;                           // <url> closing tag
}


Now if we have a few URLs containing dynamic parameters, we can extract them from our database and automate the process of generating URLs for each parameter, similar to the example shown above.

$entityIds = Entity::pluck(‘id’);                        // extract all ‘id’s

foreach ($entityIds as $entityId)                        // loop through ‘id’s 
{
    $url = $baseUrl . “/entity/$entityId/holiday/index”;
    $lastmod = Carbon::now()->toIso8601String();

    $sitemap .= “\t<url>” . PHP_EOL;
    $sitemap .= “\t\t<loc>$url</loc>” . PHP_EOL;
    $sitemap .= “\t\t<lastmod>$lastmod</lastmod>” . PHP_EOL;
    $sitemap .= “\t\t<priority>0.80</priority>” . PHP_EOL;
    $sitemap .= “\t</url>” . PHP_EOL;
}

$sitemap .= ‘</urlset>’ . PHP_EOL;                       // close the <urlset> tag


Finally, we can save the sitemap generated and conclude the process.

$sitemapPath = public_path(‘sitemap.xml’);
File::put($sitemapPath, $sitemap);

$this->info(‘Sitemap generated successfully.’);
$this->info(“Sitemap file saved at: $sitemapPath”);
$this->info(‘GenerateSitemap command completed.’); 


So we should have the complete code as shown below.

<?php

namespace App\Console\Commands;

use Illuminate\Console\Command;
use Illuminate\Support\Facades\File;
use Carbon\Carbon;
use App\Models\Entity;

class GenerateSitemap extends Command
{
    protected $signature = ‘sitemap:dynamic’;
    protected $description = ‘Generate sitemap for the dynamic website’;

    public function handle()
    {
        $this->info(‘GenerateSitemap command is running…’);
        $baseUrl = config(‘app.url’);

        $sitemap = ‘<?xml version=”1.0″ encoding=”UTF-8″?>’ . PHP_EOL;
        $sitemap .= ‘<urlset xmlns=”http://www.sitemaps.org/schemas/sitemap/0.9″>’ . PHP_EOL;

        $fixedUrls = [
            $baseUrl,
            $baseUrl . ‘/login’,
            $baseUrl . ‘/password/reset’,
        ];

        foreach ($fixedUrls as $url) {
            $lastmod = Carbon::now()->toIso8601String();

            $sitemap .= “\t<url>” . PHP_EOL;
            $sitemap .= “\t\t<loc>$url</loc>” . PHP_EOL;
            $sitemap .= “\t\t<lastmod>$lastmod</lastmod>” . PHP_EOL;
            $sitemap .= “\t\t<priority>1.00</priority>” . PHP_EOL;
            $sitemap .= “\t</url>” . PHP_EOL;
        }

        $entityIds = Entity::pluck(‘id’);

        foreach ($entityIds as $entityId)
        {
            $url = $baseUrl . “/entity/$entityId/holiday/index”;
            $lastmod = Carbon::now()->toIso8601String();

            $sitemap .= “\t<url>” . PHP_EOL;
            $sitemap .= “\t\t<loc>$url</loc>” . PHP_EOL;
            $sitemap .= “\t\t<lastmod>$lastmod</lastmod>” . PHP_EOL;
            $sitemap .= “\t\t<priority>0.80</priority>” . PHP_EOL;
            $sitemap .= “\t</url>” . PHP_EOL;
        }

        $sitemap .= ‘</urlset>’ . PHP_EOL;

        $sitemapPath = public_path(‘sitemap.xml’);
        File::put($sitemapPath, $sitemap);

        $this->info(‘Sitemap generated successfully.’);
        $this->info(“Sitemap file saved at: $sitemapPath”);
        $this->info(‘GenerateSitemap command completed.’);
    }
}


Defining The Route

We can define the route of the sitemap in the ‘web.php’ file of our project.

Route::get(‘/sitemap.xml’, function() 

{
    return \Illuminate\Support\Facades\Redirect::to(‘sitemap.xml’);
});


Defining The Schedule Method In The Kernel

The script can be triggered automatically to run at a particular time. 

use App\Console\Commands\GenerateSitemap;             // define the controller path


protected function schedule(Schedule $schedule)
{
    // Run the command daily at 5 PM
    $schedule->command(GenerateSitemap::class)->dailyAt(’17:00′);
}


References:

  1. https://www.uplers.com/blog/all-about-of-sitemap/
  2. https://www.linkedin.com/pulse/understanding-difference-between-dynamic-static-sitemaps-arslan-elahi
All search results